Friday, September 30, 2011

Spongebob Inspired Nails for short Nails

So, my sister makes duct tape wallets right. And she made my daughter a spongebob one. It is always lying around. One day I was putting it away and thought wow, spongebob seems like it would be a simple look to do. But it is sooo out of my element. I am so not good with cartoons or characters, but it looked easy. So I tried and this is what came out. I hope you all enjoy it. Below will be a link to my You Tube Video if you want to watch.

List of Products Used:
Base Coat-Sephora by OPI
Neon Yellow - KleanColors
Bright Pink - By LA Colors
French Pink - NYC
Catch Me - KleanColors
Night - Petites
Bar-B - Wet N Wild
Blue Print - Milani
Lime- Nabi
baby blue - LA Colors
Red - LA Colors
White - LA Colors

The OutCome:


You Tube Video Link :

Thursday, September 29, 2011

ENTER THE BLOG CONTEST

Only a little more than 24 hours until the contest closes. The last submission will be accepted until Friday September 30th, 2011 at 11:59pm. I hope you enter and GOODLUCK!

Thursday, September 22, 2011

Breast Cancer Nail Art Contest

Hello all my Nail Polish Fanatics <3
I always see videos and read blogs on Halloween this and Halloween that. Now, don't get me wrong, I looove Halloween. It is the best time to be anyone but yourself. Although October is not only about Halloween, it is BREAST CANCER AWARENESS MONTH! I have my Boobies bracelet on and ready, do you?? Well It is simple to win this contest, so don't be shy to enter. I am a novice as well. And if you are more experienced and want to win a bigger prize, be sure to check out my contest on YOU TUBE where I will choose 3 winners, and check out the prizes too!

Contest Date: 9/23/11-9/30/11
Contest Theme: Breast Cancer Awareness

Rules:
1) Must Follow my Blog.
2) Must be 18 years or older or you can have your parents permission.
3) To enter contest you must create a Breast Cancer Nail design and take a picture and send it to me.
4) In the back ground of your picture you must have a piece of paper with "My Entry to Designs4ShortNails Contest" or have it in your hand.
5) You don't have to show the steps, but it would be nice too.
6)Email it to me @ Crystals.Designz@Gmail .com

That is it, simple and fast. This is really for beginners, and if you are really confident, join my contest on YouTube for a bigger prize.

I hope to see all your entries, and the winner will be posted in my blog. So, YAY!! I can't  wait to see all the entries :)

The winner will receive:


Passion Purple Manicure

So, after I did those Anti - Cupcake nails, I used a purple in those. Purple fairy by Klean Color and I instantly remembered why i bought that color. It was an amazing purple. So, I instantly thought of a slanted french tip. Call me crazy, I decided to do my nails for the weekend and came up with this design. I absolutely loved it and was sad when it chipped a few days later. I really wanted to keep it on. I mean, i could always redo it....but I have other polishes to use too haha. After I finished the look, I decided it needed a little something extra and added a konad design. So , all in all it was my favorite manicure yet, and probably cuz it was all purple.

Items Used:
Seche Clear- BaseCoat
Elf - Lilac
Elf - Party Purple
LA Colors - Black
Seche Vite - Top Coat

Also Used:
Dotting Tool
Konad Image Plate m24
Konad Purple Polish

And here is the design I came up with, I hope all you purple fanatics out there love it!!


My Anti-Cupcake nails

So, my sister asked for me to do a cupcake nail. Well, I am not so girly, but I did it anyways. So, I googled cupcake pictures to get the icing right, and I ran across this pic and it was soooo me. I called it my anti cupcake design. It is perfect for not so gurly girls and I even used darker colors to get that edgy look. I will post a pic of my inspiration, tools I used and pics of the nail art. I hope you like these, and be sure to follow my blog, as I have a contest coming up.

Items used:
Seche Clear - Base Coat
KleanColor - Fairy Lover
LA Colors - batch 2605
Seche Vite - Top Coat

You will also need either a toothpick, fine brush for designs and a piece of paper to put nail polish.

My inspiration:
 And here is my design :)


Cupcake Nails ~ Requested

So, my lovely sister calls me at midnight like she is having a heart attack or something. I ask her whats up and she says CUPCAKE NAILS. I say whatt??? She says to come over and pick up some micro beads I think she calls them. Sooooo... Here is what transpired from her thoughs. Cupcake inspired nails. They are simple and easy , one hand took a little over 5 minutes and finished in under 10. So this is definitely a cute, fun and simple manicure for those of you cupcake lovin' people. I hope you enjoy.
And in case you want to see how it is done, here is the link to the video.
http://youtu.be/45Zn2M3QKHI Cupcake tutorial.

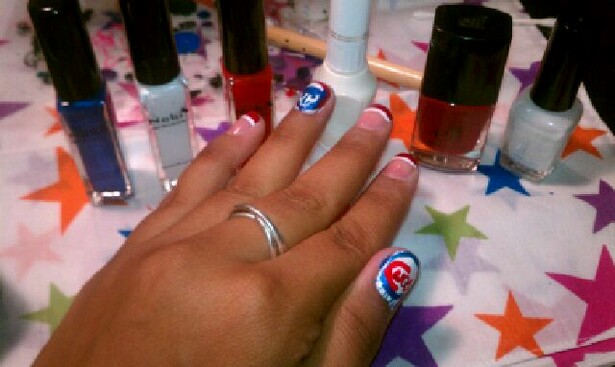
So A list of the products I used:
Seche Clear - Base Coat
Frosted Fuchsia - Wet N Wild
Blue Print - Milani
Blue Mist - Elf
Gold - LA Colors
Prospect Park Pink - NYC
Wine Frost - KleanColors
Seche Vite - Top Coat

You will also need:
Dotting tool / tooth pick
Micro beads


Wednesday, September 21, 2011

Broadway~Mistakeproof Pink Brush -on Gel Nails

Okay so I was on one of my many excursions at Rite Aid and the night before was roaming on You Tube and saw many videos on the Kiss Instant Gell set. Everyone was raving about the set, how great it was and how easy it was to do. Wellll. Needless to say, i couldn't find it. But, there was a sale, and I couldn't pass it up, so I bought the Broadway Mistakeproof brush on gel, Salon nails made sinple. I got so excited and the box said 3 easy steps and no filing needed. I was like wow, this is gonna be great. Some quick, pretty nails and I can be on my way. Wellll. Let me tell you about my experience.

Over View:
For one thing, there is actually over 8 steps once you begin until you are finished with your nails. There is filing needed, shaping needed, and everything is messy and hard to apply. My left hand obviously came out better since I am right handed, but the application was still sloppy. the formula is thick and stringy and you can't get an even application no matter how steady you attempt to keep your hand. After you apply the gel and let it set, you have to do alot of filing and shaping of the nail and it becomes really hard if the gel is not set yet and you can ruin your application. Well. It took from 5:34pm until 6:30 pm the next day to fully dry.
After I thought it would never dry, I thought , well maybe if I apply polish it will help it to start drying. So I just painted them , I used an Essie polish, Damsel in a dress and went about my evening. Let me just say I woke up to many marks and nicks on my nails and I didn't go to bed until 2am. To top that off, the next day as I was getting dressed my thumb nail broke in the middle while I was pulling up my jeans.

Summary:
The price of this kit is$9.99, for the price you can buy 2 boxes of the glue on nails and have much better luck and way more staying power. I would NOT recommend anyone to purchase this kit. Go with an alternative. There are way too many steps, the box gives false information, and the outcome is not up to standards. And by day 2 I had 3 broken nails and only did normal things. IE: Getting dressed, dishes, homework, cooking and so forth. So, If you are looking for a cheaper way to attain a salon manicure, this set is not the one for you. I will be searching for the Kiss one, and I will give that a try as well. All in all, thank you for reading and I hoped this helped for those of you out here reading:).

Pics of Box and Directions:


Final Result:

Wednesday, September 14, 2011

Lively Lilac

This manicure took me less than 10 minutes. Super easy, super cute and super sinple. All you need to recreate is the following:

Products used:
Base Coat: Seche Clear
Nails: Sally Hansen metallic purple Nail Pen
Nail Art Decals of your choice
Top Coat: Seche Vite


Acylic Nails - For beginners

These are some Acylic nails that I do on my spare time. I hope you guys like the designs. I am practicing my designs in hopes to get better :)


Thanks for taking the time to check this out!

Chicago Cubs

These are my Chicago Cubs Inspired Nails. I will include the pictures which inspired my design as well as pictures of my design. I am still learning so be nice, as I am practicing my hardest.

Products used:
Base Coat: Seche Clear
Petites: Sapphire
Flirt: Blue
Nabi: White
Nabi: Red
Top Coat: Seche Vite

Photos Replicated:


Okay , remember I am a beginner haha. Here is my nail design: